It usually happens at the worst possible moment. You have just come back from a trip, or finished a shoot you cannot repeat, and the camera says the card needs to be formatted. Or the card mounts on the laptop and shows an empty folder. Or nothing happens at all, and the device makes that small clicking silence that means it has given up. In that moment most people do one of two things. They format the card because a dialogue box suggests it, or they panic and start trying everything at once. Both reactions are understandable, and both can destroy what little was left. Understanding what SD data recovery actually is changes that moment from a crisis into a procedure.
The Card That Went Silent Overnight
A memory card is a small computer. It has a controller, memory chips, a file system and firmware, and it is built to be cheap and disposable rather than durable. That combination explains almost every failure you will ever see. The card did not decide to lose your files. Something in the chain of components stopped behaving, and the data is still sitting in the memory chips while the path to it has broken.
This is the single most important thing to understand about recovery. In the majority of cases, the files are not gone. They are unreachable. The difference between those two words is the difference between a successful recovery and a lost archive, and almost everything in this article follows from it.
How an SD Card Stores a Photo — and What “Deleted” Really Means
When you take a photo, the camera writes data into free space on the card and then records in a small table where that data begins and ends, what it is called and how long it is. That table is the file system. It is the card’s index, and it is a very small part of the total storage.
The File System as a Map, Not a Container
The file system does not contain your photos. It points at them. Deleting a file normally removes the entry from that table and marks the space as available, while leaving the actual data untouched. Formatting does something similar at a larger scale. The card is told that the whole area is free, and the old entries are discarded.
That is why so much can be recovered. The photographs are still physically present in the memory chips, in the same order they were written. What has been lost is the signpost, and signposts can be rebuilt by reading the raw data and looking for the patterns that identify individual file types.
Why the Data Survives Until Something Overwrites It
The catch is that “free” means available for reuse. Every new photo, every new video, every thumbnail and every index update writes into that space, and what is written replaces what was there. There is no undo. Recovery works only on data that has not yet been overwritten, which is why time matters more than any software choice.
This is also why the standard advice exists and why it is repeated so often. Stop using the card immediately. Not because the card is dangerous, but because the camera, the phone or the laptop will happily write to it in the background while you think about what to do. Cache files, thumbnails, index rebuilds and automatic backups all count.
Where Cards Fail Physically: Controller, NAND and the Broken Connector
Physical failures are a different category entirely, and they need different handling. The most common is a controller failure, where the card’s internal processor stops responding and the card is no longer detected at all. The memory chips underneath may be perfectly intact. The second is a failure in the NAND memory itself, where blocks become unreadable, often presenting as a card that mounts but returns errors or corrupted files. The third is mechanical: a cracked casing, bent contacts or a broken write-protect switch, which is often the easiest to address and the most often misdiagnosed.
Understanding which one you have is the first real diagnostic step, and it is usually visible in how the card behaves rather than in what the error message says.
The First Ten Minutes After Data Loss
What you do in the first few minutes has a disproportionate effect on the outcome. There is a short list of correct actions and a long list of tempting wrong ones.
Stop Using the Card Immediately
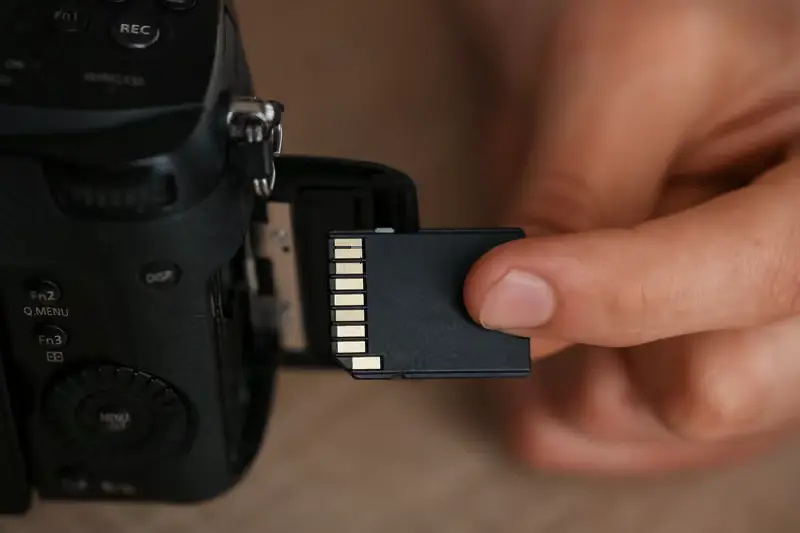
Remove the card from the device and put it somewhere safe. Do not take one more photo to test whether it still works. Do not open the card to see whether the files are there. Do not copy a few files and then continue. Every one of these actions has a chance of writing to the space where your lost files live.
If the card is in a phone, turn the phone off or at least stop using the camera and any app that writes to storage. If it is in a camera, take it out and put it in a case. The card is now evidence, and the correct handling of evidence is to leave it alone.
The Difference Between a Card That Won’t Mount and a Card That Won’t Read
These two symptoms look similar and mean different things. A card that will not mount is usually a file system or controller problem, and recovery software may be able to read the raw data even when the operating system refuses to show the drive. A card that mounts but returns read errors, hangs, or copies files that turn out to be corrupt is usually a hardware or memory problem, and software scanning can make it worse by putting the card under sustained load.
The practical rule is simple. If the card mounts and the computer can see it as a device, a software scan is a reasonable first attempt. If the card does not appear at all, or appears and then disconnects, stop and consider professional help before running anything.
What SD Data Recovery Actually Involves
Recovery is not one technique. It is a set of approaches, and which one applies depends on what failed.
Logical Recovery: Reading the Raw Data and Rebuilding the Map
Logical recovery means reading the card at a low level, bypassing the file system, and reconstructing an index from what is found. The software scans the raw data for file signatures, the specific byte patterns that mark the beginning of a JPEG, a RAW file, an MP4 or a PDF. It then attempts to determine where each file ends, and presents the results as a list of recoverable files.
This works well when the file system is damaged but the data is intact. It works less well when files are fragmented, because a fragmented file is stored in several separate places and the software has to guess how the pieces connect. On a card that has been used for years and rewritten many times, fragmentation is the norm rather than the exception.
Photo and Video Reconstruction: Why JPEGs Return and MP4s Break
This is the part that surprises people most. Photographs usually come back intact, and videos often come back broken. The reason is the internal structure of the formats. A JPEG is a single self-contained block of data with a clear beginning and a clear end, so it can be identified and extracted even if the index is gone. Most video formats store their index, the list of frames and their positions, at the end of the file. If the recording was interrupted, or the card failed before the file was closed, that index was never written.
The result is a video file that exists and will not play, because the player cannot find the map of frames. This is where a second step becomes necessary. Repair software rebuilds the container and the index by reading the actual frames, which frequently rescues footage that a plain scan reported as unrecoverable. Many people give up at the first stage without knowing that the second exists.
Physical Recovery: When the Card Must Be Opened, Not Scanned
Physical recovery means working on the hardware. In a chip-off recovery, the memory chips are removed from the card and read directly with specialised equipment. In a controller swap, the memory is moved to a donor card of the same model so that a working controller can access it. These procedures require a lab, a similar donor card and a level of precision that cannot be improvised.
They are also expensive, often several hundred euros, and worth it only when the data cannot be replaced. The decision is not about the cost of the card. It is about the cost of the photographs, and that is a question only the owner can answer.
The Mistakes That Destroy Files Before Recovery Begins
Most unrecoverable cases are not caused by the initial failure. They are caused by the response to it.
Formatting to “Fix” the Problem
A camera says the card is not formatted and offers to format it. The owner agrees, hoping it will help. It does the opposite. Formatting rewrites the file system and, depending on the option chosen, may also discard the allocation tables that made reconstruction easier.
There is one exception worth knowing. A quick format, which only resets the index, often leaves the data intact, and recovery after a quick format is frequently successful. A low-level format or a secure erase overwrites the data and ends the conversation. Since the dialogue box rarely tells you which one it is doing, the correct response is always the same. Decline, remove the card and decide later.
Running Repair Utilities and “Check Disk” Tools
Operating systems offer to scan and repair a drive when it misbehaves. On a working disk this is helpful. On a card with a damaged file system it can be catastrophic, because repair tools are designed to make the file system consistent, and the simplest way to make it consistent is to remove references to files that do not fit.
I have seen cards where a repair pass reduced a recoverable set of eight hundred photos to a handful of orphaned fragments. The tool did exactly what it was built to do. It had no idea the files mattered.
Continuing to Shoot on the Same Card
This is the quietest mistake. A photographer notices something odd, decides to finish the shoot and deal with it later, and keeps using the card. Every frame written in the meantime occupies space that may have held an earlier file.
The same applies to using the card in a phone after removing it from a camera, or to copying files onto it from a computer to check whether it still works. Any write is a risk, and there is no way to know in advance which one lands on top of something important.
Choosing Software Without Wasting Money
The market for recovery tools is crowded, and the differences that matter are not the ones advertised.
What a Demo Version Should Show You Before You Pay
Almost every tool offers a free scan and preview. The preview is the real test, and it is often deliberately limited. A good tool shows you thumbnails of recoverable files at a size where you can tell whether the photo is the one you need. A tool that shows file names without previews, or blurs the previews so heavily that you cannot judge them, is asking you to pay blind.
Run the scan, look at the previews for the files you care about most, and only then decide. If the preview shows your files clearly, the tool can probably recover them. If the preview is empty, paying will not change that.
Why a Cheap Tool Can Be Worse Than None
There are two failure modes to watch for. Some tools install onto the same drive they are recovering from, which overwrites data as part of the installation. Others write their temporary files and recovery output to the source card by default, which is the worst possible behaviour and is usually a setting you have to change manually.
Always install the software on your computer’s internal drive, not on the card. Always set the output location to a different drive entirely. And always work from a copy if you can make one, which brings up the safest approach of all. If the card is stable enough to be imaged sector by sector, do that first, and run every scan against the image. The original never leaves the drawer.
When to Stop and Hand It Over to a Lab
Professional help is justified earlier than most people think. The signs are clear enough to act on. Stop if the card is not detected at all. Stop if it disappears during a scan. Stop if it makes noises, which is unusual for SD cards but happens with some adapters and readers. Stop if the files are the only copies of something irreplaceable and the value is clearly higher than a lab fee.
Stop especially if you have already run several tools with no results. Repeated scans on a failing card can push it past the point of no return, and a lab stands a much better chance on a card that has been handled carefully than on one that has been scanned twelve times.
What Recovery Rates Actually Look Like — and What Nobody Promises
No honest provider promises a specific rate. What can be said is that outcomes cluster around a few patterns. Deleted files on a card that was used briefly often recover at high rates. Files lost to a quick format usually recover well if no new data was written. Files lost to overwriting, secure erase or long continued use recover poorly or not at all.
Videos are the weakest category, for the structural reasons described earlier, and RAW files are usually stronger than expected because their internal structure makes them identifiable. The honest expectation is somewhere between most and none, and any provider who guarantees a number before examining the card is selling confidence rather than capability.
Protecting the Next Card: Habits That Prevent This Post
Prevention here is unglamorous and highly effective. Format the card in the camera, not on the computer, because the camera writes the structure it expects. Use cards from reputable manufacturers, since counterfeit cards are a leading cause of sudden failure and often report a capacity they do not have. Replace cards after a few years of heavy use rather than waiting for a failure. Never remove a card while the camera is still writing.
And copy your files off the card as soon as practical, to two locations if the material matters. A card is a transport medium, not a backup. The people who lose the most are almost always the ones who treated the card as the archive because the trip was busy and the laptop was full.
Five Costly Myths About SD Card Recovery
The first myth is that formatted means gone. A quick format usually leaves the data untouched, and recovery afterwards is often successful if nothing new was written.
The second is that recovery software can fix a card. Software reads data. It does not repair hardware, and a scan on a failing card can make things worse.
The third is that a card showing zero bytes has nothing on it. That reading describes the file system, not the memory. The data is often still there.
The fourth is that a professional lab is only for expensive shoots. Labs are for irreplaceable data, and a family’s only photographs of a grandparent qualify just as much as a commercial job.
The fifth, and the most common, is that the files are backed up somewhere. They usually are not. The moment of failure is the wrong moment to check, and the right moment was before the trip.
Final Thoughts
SD data recovery is not magic and it is not a lottery. It is a procedure with a clear logic. The card stores data in memory chips and keeps an index of where that data lives. When the index breaks, the data stays where it was, and recovery is the work of rebuilding the index by reading what remains. Everything else follows from that.
The part that decides the outcome is rarely technical. It is whether the person holding the card stops, thinks and refuses the format prompt. It is whether they run one careful scan against a copy instead of five hasty ones against the original. It is whether they treat a card as a temporary carrier rather than a permanent home for the only copies of something they love.
And there is a quieter lesson in all of this. A memory card is one of the cheapest things in a photographer’s bag and it holds the most valuable. The photographs on it cannot be reshot, and no amount of equipment compensates for their loss. Spending ten minutes learning what to do when the card goes silent is, in the end, a very small insurance policy on something that will never happen twice the same way.